How to use Lexply
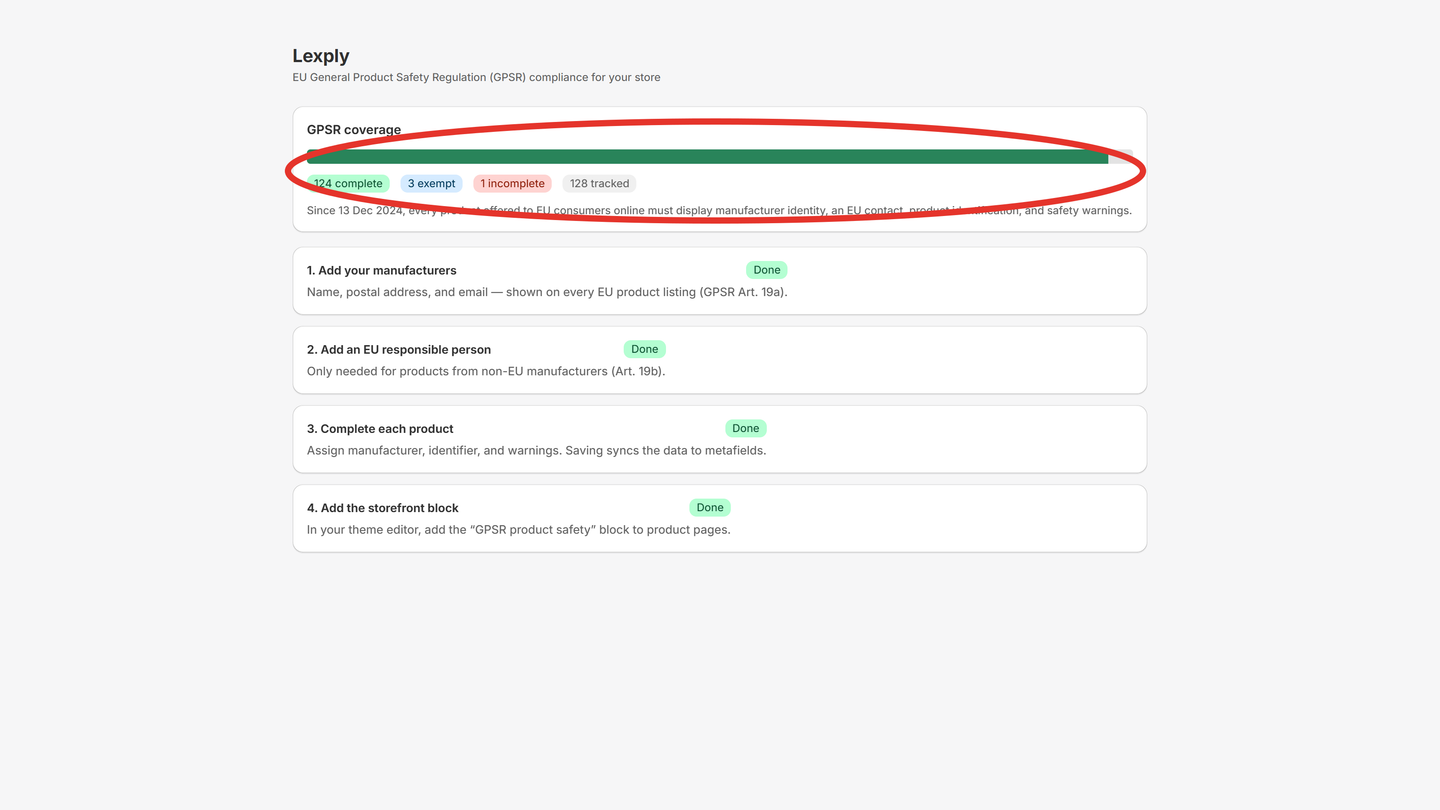
Watch your compliance coverage
The dashboard shows how much of your catalog is GPSR-ready and walks you through setup in four steps. The bar and badges update every time you save a product. Pro merchants can export the whole audit as a CSV from here.
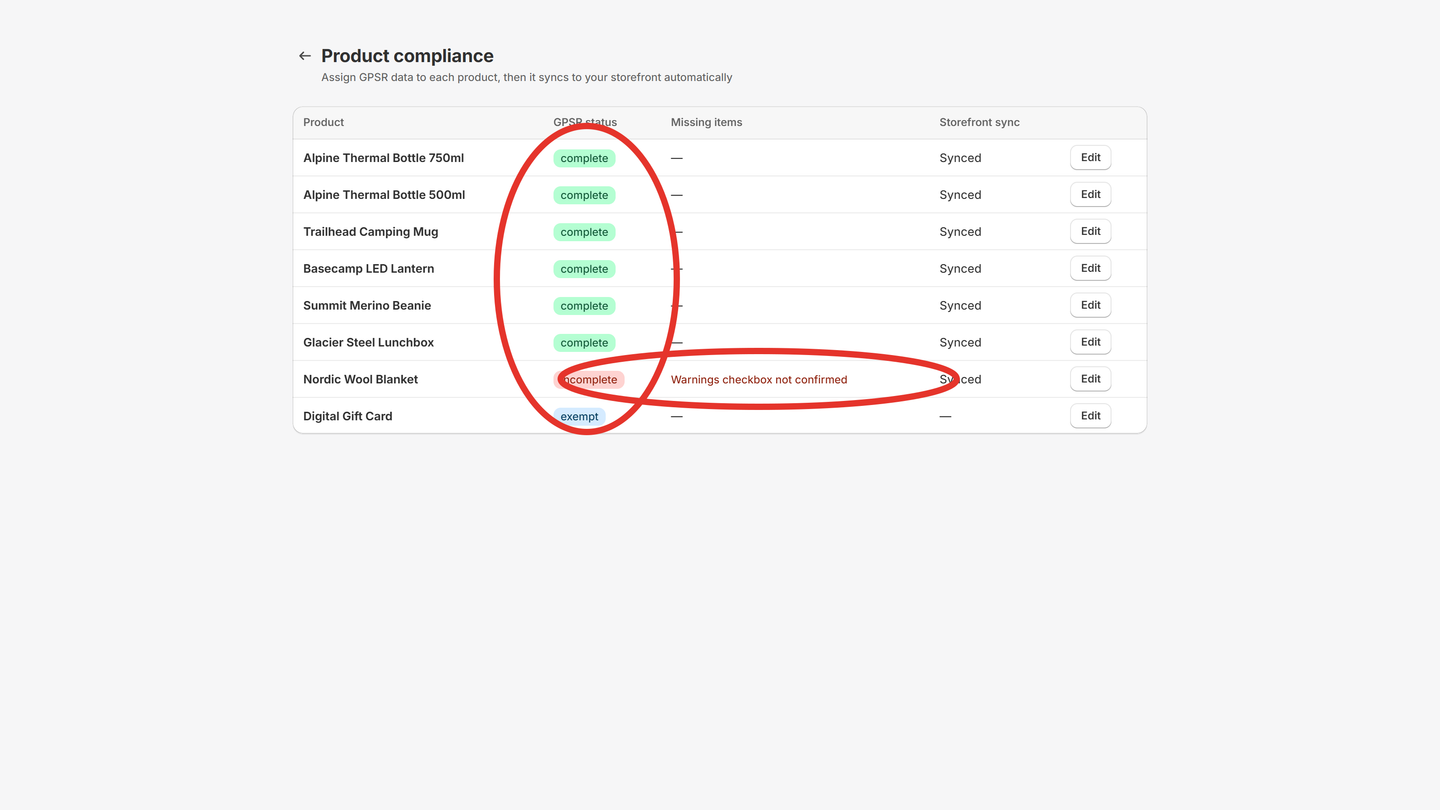
Find what's missing
Open Products to see every item's GPSR status. Anything incomplete tells you exactly what's missing in plain English — no legal homework. Click Edit to fix it.
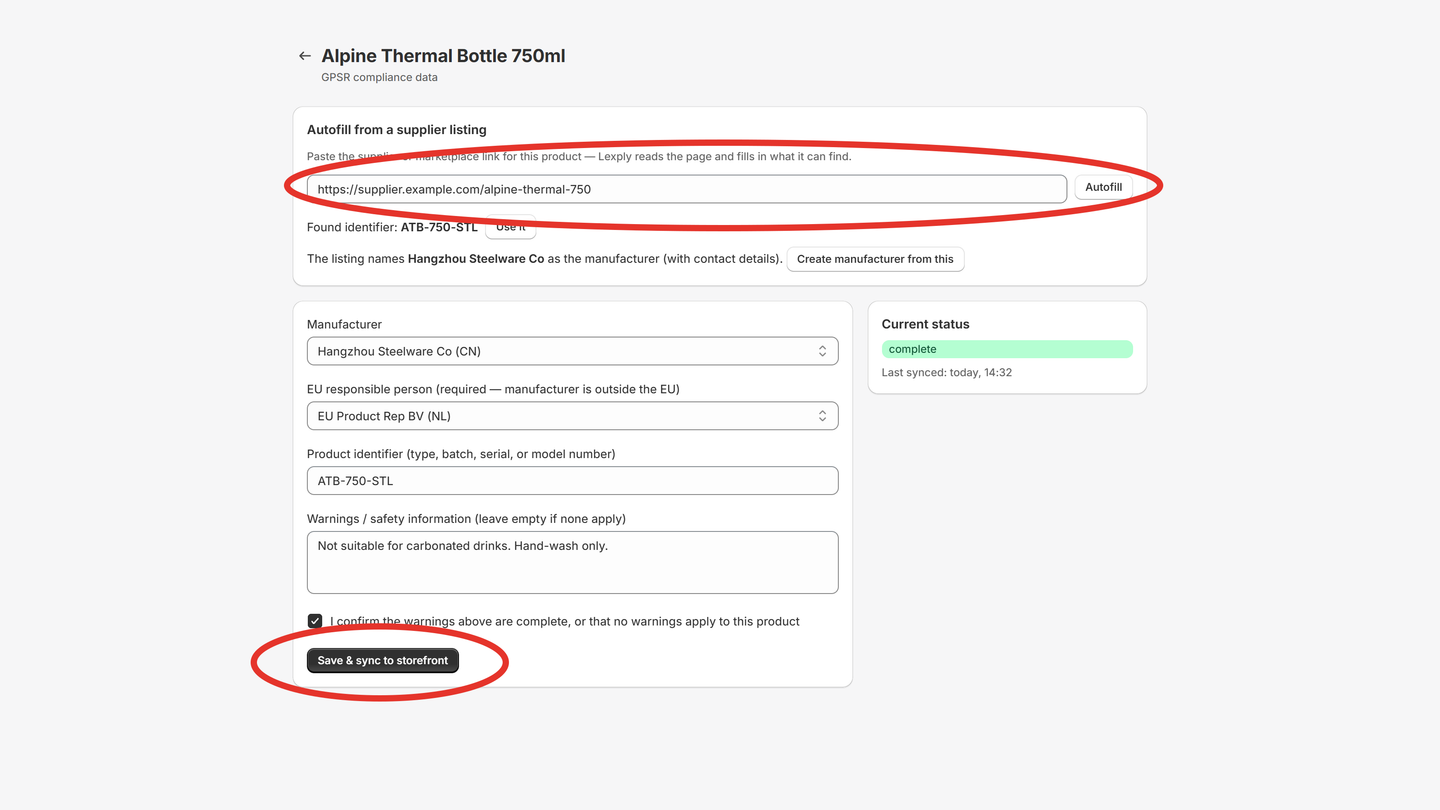
Autofill from your supplier's page
On a product, paste the link to your supplier's or manufacturer's product page and hit Autofill. Lexply reads the page and fills in identifiers and manufacturer details for you (on Pro, AI reads pages that have no machine-readable data at all). Check the fields, then Save & sync — the data flows straight to your storefront.
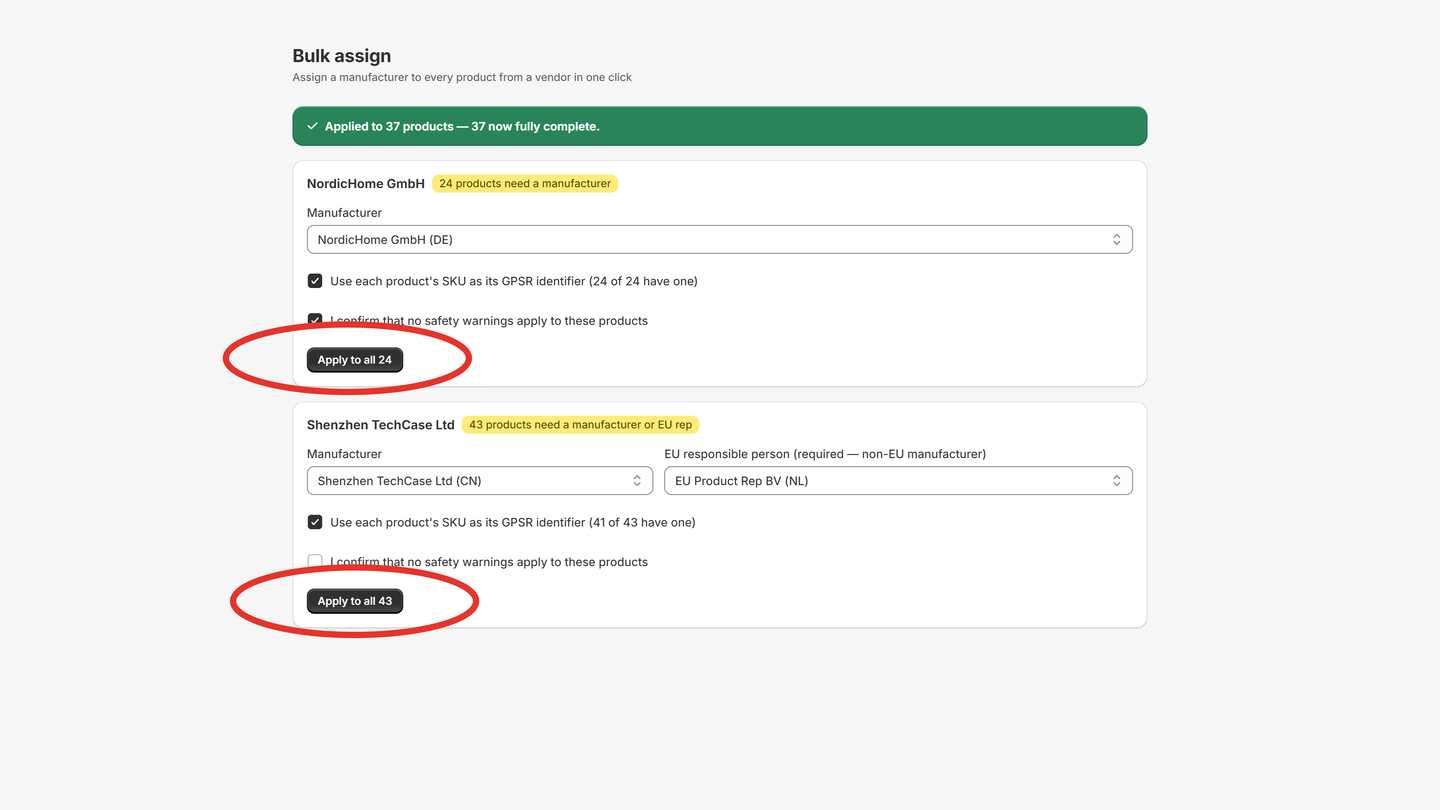
Fix whole vendors in one click
Bulk assign groups every product that still needs a manufacturer by its vendor. Pick the manufacturer (and an EU responsible person when one is required), tick the SKU option, and apply to the entire group at once.
Show it on your storefront
In your theme editor (Online Store → Themes → Customize), open a product page and add the "GPSR product safety" block. It automatically renders the manufacturer, EU responsible person, warnings, and identifier you saved — no theme coding. You can rename every label right in the theme editor, e.g. to German or French.